
Rigging
Unroll your sail on a surface which can’t damage your sail.
Set your boom and extension to the length indicated on the sail.
To ease the mast insertion, start by inserting the top section of the mast first, then slide in the bottom section and proceed to slide mast all the way up the mast sleeve. Make sure that your mast ferrule is clean and free from sand. Join the mast and check that the mast is properly joined together. Avoid crushing the monofilm as this might cause permanent wrinkles in the monofilm panel.
If there is an adjustable head, set it to the shortest possible setting, or if you are using a longer mast than specified adjust the adjustable head cap accordingly.
Downhaul the sail to the recommended luff length, making sure your leech is loose as described in the diagram below. Make sure that the tack pulley is within 2-3 cm of the downhaul cleat. Adjust the foot tension with the tack strap.
Attach the boom to desired height. A good starting point is shoulder height when you are standing next to sail.
Thread your outhaul and tension to prescribed length. This should be about 2-3 cm of positive tension from the neutral position.
Finally, tension all battens until the vertical wrinkles through the batten pockets disappear.
RDM vs SDM
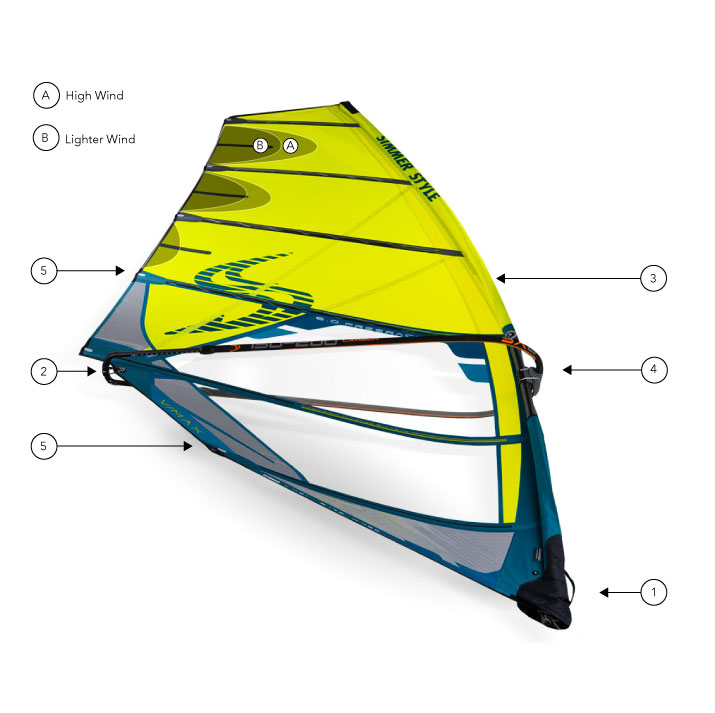
Before You Hit The Water
1. Downhaul
When the V-Max is correctly downhauled, the leach should be loose approximately 1/3 into the sail body between the top batten and the second batten from the top. If the sail is overpowered, you can add 1-2 cm to the downhaul. If you add too much downhaul, the sail will become unstable.
2. Outhaul
With the downhaul set, apply your outhaul according to the specified settings. This is an average setting for most conditions. You can decrease the power by adding 1-2 cm more outhaul, or in lighter winds, you can increase the power by reducing the outhaul by 1-2 cm.
3. Mast Join
Make sure that your mast ferrule is clean and free from sand. Join the mast and check that the mast is properly joined together. Note! A mast which breaks due to a gap between the mast parts is not covered by Simmer Style warranty.
4. Boom Height
A good starting point is shoulder height when standing next to the sail. A lower boom will give you more control and depower the sail. A higher boom will increase the power. The boom height is very personal. A higher boom position requires more outhaul than a lower boom position. If you have your boom towards the top of the sleeve cut-out, you need to add approximately 2.5 cm from the neutral outhaul setting. If you ride with your boom towards the bottom of the sleeve cut-out, you must decrease your outhaul by approximately 2.5 cm from the neutral setting.
5. Batten Tension
Finally, tension all battens until all vertical wrinkles through the batten pockets disappear. Proper batten tension is crucial for high-end performance. It is important not to over-tension the battens. An over-tightened batten will ”S” bend, negatively effecting performance. The top two battens only require neutral batten tensi
Specifications
| size | boom | luff | mast | rec mast | upgrade mast | top | battens | weight (kg) |
|---|---|---|---|---|---|---|---|---|
| 4.8 | 162 | 399 | 400 | SX8 RDM or SDM | SX10 RDM or SDM | adjustable | 6 | 3.8 |
| 5.4 | 164 | 416 | 400 | SX8 RDM or SDM | SX10 RDM or SDM | adjustable | 6 | 4.0 |
| 6.0 | 175 | 431 | 430 | SX8 RDM or SDM | SX10 RDM or SDM | fixed | 6 | 4.2 |
| 6.6 | 191 | 439 | 430 | SX8 RDM or SDM | SX10 RDM or SDM | fixed | 6 | 4.4 |
| 7.2 | 204 | 455 | 430 | SX8 RDM or SDM | SX10 RDM or SDM | fixed | 6 | 4.6 |
| 7.9 | 222 | 466 | 460 | SX8 SDM | SX10 SDM | fixed | 6 | 4.9 |
| 8.6 | 232 | 484 | 460 | SX8 SDM | SX10 SDM | fixed | 6 | 5.2 |
Safety & Warranty
Maintenance
- Do not use abrasives, harsh chemicals or solvents to clean your sail.
- Avoid sharp and abrasive surfaces.
- Stop using your sail in case of puncture. In an emergency, temporarily repair with thick, non-stretch tape.
- Do not leave exposed to UV light for extended periods - films degrade rapidly.
- Rinse the film free from salt and sand with fresh water after use and leave to dry before storage.